Showing posts with label Recipes. Show all posts

March 9, 2011

Best Brownies Ever, A Respectful Variation on the Malgieri Brownie

Last week was my husband's 35th birthday and instead of a cake, he requested a chocolate brownie sundae that oozed chocolate. I had a sneaking suspicion he might be supporting my recent need to indulge in chocolate-y goodness every few days as exhibited by the fact that the only recipes I've posted lately have been chocolate. But I resolutely pushed aside my conspiracy theorist tendencies and got to work. A brownie sundae begins with the perfect brownie and I intended to find it.

But first - I have a confession to make. Please, don't judge me too harshly.

I have never been a big brownie fan. They have never done it for me. While I love dark chocolate, I prefer it in creamy desserts like mousse or a chocolate creme brulee. So, I knew the brownie would have to be the perfect texture and flavor to tempt me. And, I figured if I could find a recipe to tempt a non-brownie lover like me, my intended audience would be happy too.

I started with a brownie from the Smitten Kitchen, one of my favorite sites. See it here. I liked the description of the recipe she posted because it was so easy, used only cocoa powder and didn't require my tempering any chocolate. But, when I tasted the finished product, the cocoa powder bitterness stood out to me. I didn't do the brownie any flavors by leaving it in the oven just a minute or two too long (classic brownie error!). It was still chewy fudge-y but I could tell I'd overdone it. It was not a bad brownie by any means - just not the one I was looking for. By the way, if you haven't visited the Smitten Kitchen yet, you should. She's a really funny writer, the pictures are great and the food is phenomenal. You'll love me for it!

Next, I tried the Best Brownie EVA recipe over at the feeding time blog. And, in classic "Monna" style, I altered it by adding just a little cocoa powder since I wanted it to be SUPER chocolate-y. And, it was. But, the cocoa powder definitely gave the brownies a bitter flavor. More importantly, when those brownies came out, I realized the real problem.

I thought I wanted a fudge-y brownie. But, both those fudge brownie recipes seemed heavy, flat muddled. I wanted a taller, chewier brownie with a with a crispy top that would showcase the flavor of chocolate and finish with chocolate chunks melting into my mouth. I'm serious about chocolate.

Know how they say third time's the charm? Well, it was. In my insane perusal of hundreds of brownie recipes to find the perfect one (maybe that's an exaggeration but barely. I spent way too many hours on this project!), I stumbled across several forums frequented by people much closer to "nuts" about brownies than me. We're talking some seriously passionate, brownie-pated individuals! Several of them referred to a recipe for Supernatural Brownies by a guy named Nick Malgieri as the ultimate brownie. I had to find it.

Sure enough, I discovered the recipe in another of my favorite places. The website for the American Public Media radio show called The Splendid Table, hosted by Lynne Rosetto Kasper had the recipe posted here.

By now I'd learned a few things about brownies, so I tweaked it just a leeeee-tle. I just can't help myself. I have a chronic tendency to change recipes.

And, this one nailed it. I can't tell you what your taste in brownies should be. But, if you want the best brownie you've ever tasted, try this one. Despite the fact that it requires tempering, it's pretty darn easy. By the way, no cocoa powder. 

Notes: The pan you use in a brownie recipe makes a big difference. I used a metal Nordicware quarter sheet. That's smaller than Mr. Malgieri's recipe calls for but the smaller size lets the brownie puff up to the height I wanted while still allowing it to remain chewy. If you use a bigger pan, shorten your cooking time. If you use glass, lower the temp 25 degrees to prevent burnt and squishy brownies. Yuck.
For the record, I've been having problems with my oven, thus the wide variance in baking times. But, I'd rather have a slightly underdone brownie than an overcooked one.
Finally, for those of you who would argue this is NOT a brownie with baking powder in it, I have only to say - I don't care. It tastes DELICIOUS!

Best Brownies Ever, A Respectful Variation on the Malgieri Brownie

Ingredients
16 tablespoons butter (I used salted and decreased the salt in the recipe)
10.5 oz bittersweet chocolate pieces (I used TJ's 85% bars. Reasonably priced with a smooth flavor)
1/2 cup granulated sugar
1 1/2 cup firmly packed dark brown sugar
4 large eggs
1/4 teaspoon salt
2 teaspoons vanilla extract
1 cup all-purpose flour with 3/4 t. baking powder carefully stirred in (nothing worse than a bite of leavening)
1 1/2 c. semi-sweet chocolate chips

Instructions

Quarter sheet (12x9x1) baking pan with parchment paper and let a little hang over the sides
1. Preheat oven to 350F and set oven rack in the middle
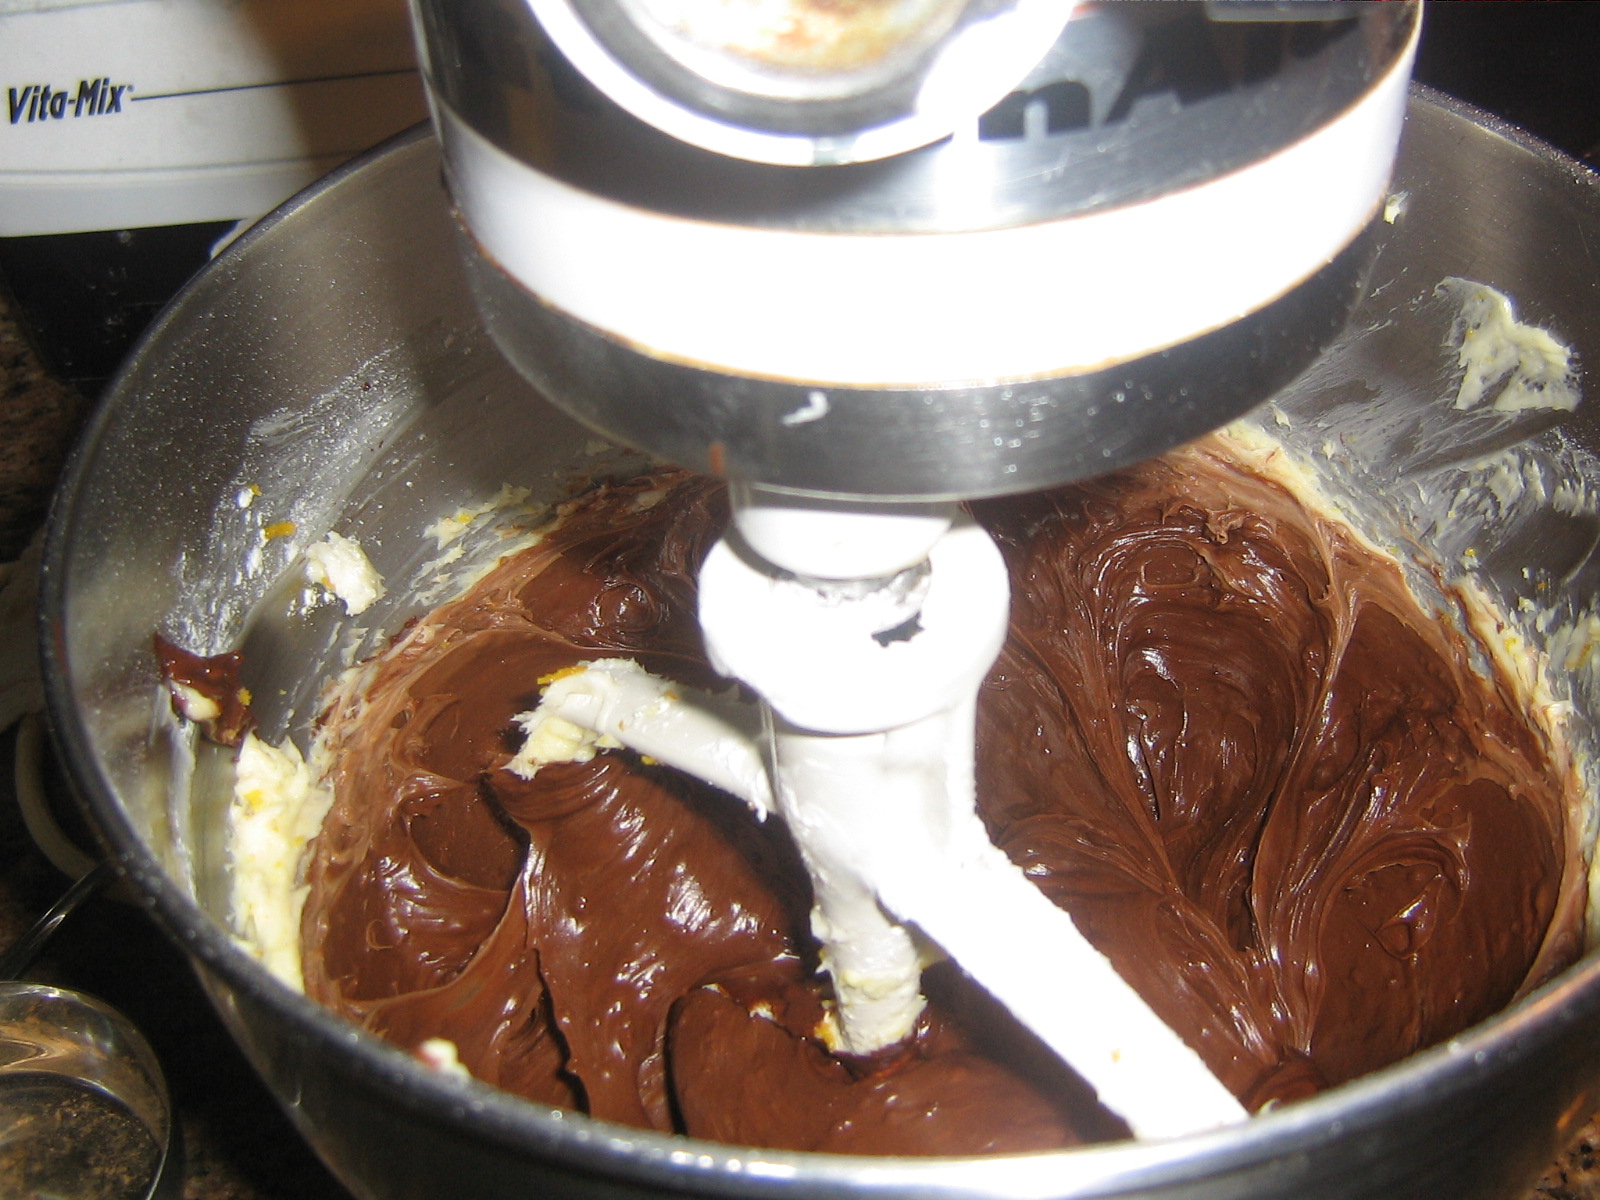
2. Bring a saucepan of water to boil and turn down to med-low. Set a heat proof bowl over the pan and combine butter and chocolate until melted. Whisk thoroughly.
3. Remove the chocolate mixture from heat and add sugar. Whisk until sugar is nearly dissolved. 
4. Let mixture cool to just warm (as in, not enough to cook eggs!) and add eggs one at a time and whisk. .
5. Add salt and vanilla and whisk. 
6. Add flour and baking powder to chocolate mixture and whisk until the batter takes on a sheen, about 1 minute. 
7. Add chocolate chips and stir in briefly.
8. Pour into prepared pan and spread evenly. 
9. Bake between 25-40 minutes. I started checking around 20 minutes. Having over-cooked a batch already, I didn't want to ruin this one. You really must do the toothpick test on a brownie. When it's done, it should have just a few damp-ish crumbs on the toothpick and spring back when you touch it with your finger. If your toothpick comes out dry, it's over-baked. Don't worry. Just eat that batch with ice cream and try again.

February 23, 2011

Devil's Food Cake with Chocolate-Orange Buttercream - oh yeah.

In light of yesterday's very serious post, I decided today should be more lighthearted and chocolate-filled. Hehe. We all need a little chocolate! As I recently stated, chocolate is great therapy when you're feeling stressed (so is sex - but I digress...)

For Valentine's Day, I wanted to make something divinely chocolate. Chocolate may be the food of the gods but I was looking for something that would make me feel a bit on the wicked side! Also, I wanted something homemade because I'd been to a few too many events recently that sported corn syrup and stabilizer filled desserts. So, I pulled out a recipe I'd used from Epicurious.com years ago and had only made once because of the time and ingredients involved.  The cake was so memorable family members will sometimes say, "Remember when you baked that chocolate cake?" Then, their eyes get misty and they start drooling as they drift away with the memory.

Well, maybe that's a little dramatic. But, my family does remember the cake and they speak of it fondly. It's a recipe that takes time - melting chocolate over a double boiler and doing everything from scratch. Although my mom was not above using boxed cakes, she taught us to bake from scratch when we were young. I've found it doesn't really take that much more time (usually) and it definitely tastes better.

The only time this didn't turn out to be true was when, as a pre-teen, I increased the baking soda in a Texas Sheet Cake from 1 t. to 1 T. You can imagine what a dreadful disaster this turned out to be - especially when I didn't discover it till the party and couldn't convince the guests to stop eating it. They all gulped it down with pained expressions while assuring me it was delicious (as though I couldn't taste it). AAHH!! The mortification!

This cake does take a bit more time than other homemade cakes - maybe because it uses melted chocolate, cocoa nib powder, yogurt & milk & orange zest (you get the picture), but the combination of the ingredients creates a moist, decadent, incredible cake worthy of being called the Devil's Food. I didn't use the lavender because it just didn't sing to me at the time and I didn't miss it.

So, the Saturday before Valentine's Day, I left my girls with Rob and borrowed my mother-in-law's kitchen. My oven has been running hot.

First, I melted the chocolate...

The recipe requires semi-sweet chocolate (I used Valrhona at least 70%+) melted over a double boiler. Mmmm.... 

Next, I creamed brown sugar with butter, eggs and vanilla - this is my favorite part!

In goes the cooled, melted chocolate. I think I would rather eat the batter than the cake. Well, maybe.  Or, both...
The first set of cake pans - I doubled the recipe for a really tall cake.

The frosting begins with orange zest. Yes, I used organic - no pesticide cake for us!

And, of course, more melted chocolate and a tad bit of Grand Marnier. I could eat it with a spoon!! (wait, I DID eat it with a spoon!)

And, here you can see my GIANT beautiful cake - and my big mistake! I didn't sift the powdered sugar and it was a little lumpy. No amount of mixing fixed it. But the lumps dissolved and no one complained.


Also - for those of you who know me and my aversion to eating too much sugar or giving it to my girls... We don't eat stuff like this often, but when we do, I don't try to recreate the wheel. To me, a cake is supposed to be an occasional, luxurious treat. So, this is a REAL cake made with real sugar, butter, flour etc. I would rather my girls eat this over fake corn syrup filled, shortening covered cake any day. It was incredible - and we ended up giving a lot of it away. After all, what girl really needs a four layer chocolate cake on her counter all week? If I ate it all day for a week, I couldn't get rid of it!

The original Epicurious recipe is here - but I'll warn you. I doubled the cake recipe and there was still enough frosting for the whole thing. So, if you're planning to make just a single recipe, you will have leftover frosting. It's good on graham crackers - or on a spoon if you're desperate to make it go away!

Great, I may have to break my own rules and make it again. Anyone want to help eat it?

February 3, 2011

Apple Pie in a Pan

Some of you saw my post on Facebook about this dish (I almost can't call it a recipe!). It's my lazy girl way of making pie because
1. I don't like to mess with pie crust with children around me in the kitchen. They always distract me either with cuteness or frequent requests and I invariably mess up some part of the recipe.
2. This has less carb/fat in it than pie - but it tastes DELICIOUS.

Even better, the overall cooking time is only a few minutes - maybe 6-10 - depending on how many apples you use. And, some of you may not like this - but it's not super exacting in measurements because it's meant to taste as sweet/spiced as YOU like it to taste. Be careful, this dish is addicting!

Finally, I'm posting this tonight as a favor to a friend - so no pics 'cause I'm not actually making it right now. Apparently, I'm feeling too lazy to even make a lazy dessert... haha! I'll try to add pics later.

Apple Pie in a Pan
Cooking time: As fast as you can cut up your apples + 6-10 minutes more

Apples - 1-1 1/2 per person - Any kind but I like to mix up Granny Smith with the sweeter apples like Fuji, Gala, Pink Lady etc.
Cinnamon or Pumpkin pie spice
Coconut oil or butter
chopped pecans (if you like!)
1 T. (or less) Sweetener of choice - maple syrup (the real kind!), brown sugar or honey (we use honey)

Equipment - Knife, Saute pan or wok

Instructions
1. Core and slice apples as thick or as thin as you like them (I like them 1/2-3/4 inch thick)

2. Heat a saute pan to medium heat and toast the pecans for just around a minute or so. They'll start to smell good. QUICK! Take them out before they burn.

3. Place the pan back on the heat and put just enough oil or butter in it to make it slippery - probably around 2 teaspoons. Just enough to keep the apples from sticking to the pan, not to fry them. A wok is better because you'll need less oil/butter.

4. Throw in your apples and saute them till they start to get kinda soft. Then, shake some pumpkin pie spice or cinnamon over them. If you're just making one or two apples, go light on the spice until you reach the flavor you like. Don't be afraid to taste an apple just to be sure.

5. When the apples are just shy of the consistency you want, add just a little sweetener and stir gently stir it until it melts into the apples. The idea is to keep the flavor of the apples intact and preserve the healthiness of the dish - not melt sugar all over it!  If you use a sweet apple, you hardly need any!

Regarding cooking shape - I like my apples to be soft enough that when you stick a fork in 'em, it slides out easily but the apples keeps their shape.

6. Remove the apples from heat and top with pecans. 

7. Eat

See? Lazy girl pie.

January 14, 2011

Wicked Witch's Homemade Applesauce

Once, when my oldest was about 2 1/2, she came into the kitchen and asked for an apple. Pleased she wanted such a wholesome treat, I gave her one - even though it was bedtime. She took one bite and slumped to the floor dramatically. Then, she looked up at me out of the corner of her eye and in a theatric whisper said, "It was poisoned!" Apparently, I was playing the role of the wicked witch! Thus began our family's obsession with drama - and with all things apple. After all, if it's in a fairy tale...!

Today, I'll share with you our easy recipe for homemade applesauce. In fact, this recipe is so easy, it's almost not a recipe. I made these to go with our pancakes today but they're just as good by themselves. Just a note - apples tend to cook down quite a bit since they have so much water in them - so you can add more if you're cooking for a crowd. This is the kind of recipe that you can adjust without messing it up too much!

Applesauce
Ingredients
5-6 good sized apples - I like to mix sweet and sour apples like Gala, Honeycrisp or Fuji with Granny Smith
1 c. water
juice of 1/2 lemon - optional if you're not canning your sauce - but it does balance out the flavors
1/2 c sweetener to taste - like honey or brown sugar

Instructions
1. Core and chop apples to desired size. We like chunky applesauce and we don't remove the peels. More fiber! If you like smoother applesauce, core and quarter your apples and then pulse them in the food processor. Remember they'll get squishier as they cook so they don't have to be perfect.

2. Toss apples in pan with the water and lemon juice and set to medium-high heat.

3. Once the ingredients start warming up nicely, turn heat down to medium. 

4. Keep an eye on your apples and stir regularly while they're cooking or they will burn.

5. After they get close to your desired texture, remove a bite of apple from the pan, cool and taste it. 

6. If you want to add sweetener, do so now - only 1/4 c. at a time.  

7. Let apples mix with the sweetener and taste again. Chances are you won't need much sugar since they're so sweet on their own.                                                  

Tada - Homemade applesauce!

January 7, 2011

Steel Cut Oats - Delicious and Easier Than You Think!

We're on a porridge kick at our house lately. When I say porridge, I mean steel cut oats, of course. As a young girl, I had my share of the rolled oats version of oatmeal and always found it rather lacking. The texture of the oats was closer akin to slime than a nutty oat and I always had the feeling I was eating slugs for breakfast. (What can I say, I was imaginative even as a youngster!).

Not having true slimey ogre-ish tastes (we've seen Shrek about a BILLION times at our house), when I decided to use oats to save money and feed my family something nourishing, I chose the non-slug version of oatmeal. Steel cut oats. Now, I reserve rolled oats for cookies and fruit crisps (a rarity at my house but I dream of getting around to that!).

Steel cut oats are nutty & creamy, warm and fill up your tummy! Not only that, they're filled with all kinds of great nutrients like fiber, calcium, Vit-B complex (happy vitamin), magnesium, folate and potassium. We always add a dash of sea salt and a bit of fat - like a dab of butter or some milk. I know choosing to eat saturated fats flies in the face of some current ideas of health. However, the women in our family are (usually) amazingly  long lived and they always ate real food like butter, raw milk, eggs, meat etc. A little bit of healthy fat like butter or coconut oil early in the day will give you a surprising boost of energy and keep you feeling full till lunch.

But, where to buy steel cut oats? McCann's Irish Oats may look cool on the shelf but they are pricey so I started buying Trader Joe's Organic Steel Cut Oats. Then I discovered that  I could buy them in bulk from my local Whole Foods. They're still organic but even more affordable that TJ's (though I remain a loyal fan!). I suspect if you shop at Sprouts or Sunflower markets, you can find oats in their bulk section too. Just give them a sniff because if they don't sell a lot of them, the oats tend go rancid. Nothing will ruin your first oat experience like a bowl of rancid oats!

The thing that probably keeps most people from eating steel cut oats is the cooking time. We all have places to go in the morning and no one wants to sit around waiting 30 minutes for their oats to cook!
Thankfully, it doesn't have to take all morning & once you've cooked them, you can keep them in the fridge for several days and just heat them in the morning!. Here's another option that reduces the cooking time significantly.

Steel Cut Oats
3 cups filtered water
1 cup oats
Butter or coconut oil or cream
Dash of sea salt
Toppings as desired like -
apple
cranberries
raisins
pecans, walnuts, slivered walnuts
blueberries, raspberries, strawberries etc 
cinnamon

1. The night before...Place 1 c oats in 3 cups water and soak overnight. 
2. Bring to a boil in the morning while you're nursing your first cup of coffee and cook for ten minutes. 
3. Dish into serving bowls 
4. Add a dab of butter or coconut or real cream (NO non-dairy creamer please!)
5. Add a dash of sea salt (this is optional but our family likes our porridge with salt vs. sugar.)
6. Add toppings if desired 
7. Enjoy!

December 10, 2010

Sage Cornmeal Biscuits

Last night we had a rather scary experience with our youngest, who fell off a chair and whacked her head hard enough to frighten me (which is actually pretty difficult). We called our doctor's office and they gave us the usual instructions to postpone bedtime for a while, watch for concussion signs and then wake her after about an hour of sleeping.

Unfortunately, the accident happened right before bed (of course) so the girls were up pretty late and Rob stayed up even later to wake our youngest at the proposed time. To make matters worse, she did not fall asleep right away but spent an hour after we put her to bed talking. Clearly, she was not hurt as badly as we thought (thank goodness!) but we were all pretty exhausted this morning.

So, we slept in really late and enjoyed a fun wake-up hour with the kids giggling and playing before breakfast. When we finally made our way downstairs to eat, I realized we were out of our favorite Ezekiel bread (sprouted wheat, protein rich), so I decided to make biscuits. They were so good, I knew I had to post the recipe. Then, I laughed because I realized one of the few recipes I've posted here is another biscuit recipe. So, just to clarify...we don't eat biscuits very often (unlike at my mom's house where we ate them weekly! Boy, were they good!). But, every once in a while, a good biscuit is just the ticket! These are awesome with eggs but they'd be just as good with soup.

I started with a recipe by Mary Kincaid that I found over at www.allrecipes.com. You can see it here. But, I made some adjustments to fit the way we eat, including switching to whole wheat flour and replacing the milk with yogurt. They were simply amazing - tender and full of flavor.

So, add these to your list of healthi-er, fast things you can make during the holiday season.


Sage Cornmeal Biscuits
Original Recipe Yield 10 servings
Time to prep - 10 minutes, cooking time 8-12
Preheat oven to 450 F
  • 1 1/2 cup whole wheat flour
  • 1/2 cup cornmeal
  • 1 T. baking powder
  • 1/2 teaspoon rubbed sage*
  • 1/2 teaspoon salt
Wet ingredients
  • 1/3 cup butter
  • 1/2 cup yogurt
  • 1/2 cup milk 
Tools
Food processor - you know I'm going to suggest the food processor for recipes like this because it's so fast! But, you can use a bowl and pastry cutters (or forks/knives) instead. It'll just take longer. And I don't have time for that!

Directions

  1. Combine the dry ingredients in a food processor or bowl. Pulse till ingredients are thoroughly mixed. Nothing is worse than biting into a biscuit and getting a mouthful of salt or baking powder!
  2. Add 1/3 c butter, cut into 1 inch cubes. Pulse until the texture contains coarse crumbs
  3. Add yogurt and milk and use a fork to just until moistened. If you use the food processor, just pulse lightly till the mixture barely holds together. This is one of those things you don't want to overmix. You're going to knead it anyway.
  4. Knead 5-6 times on a lightly floured surface. 
  5. Gently pat to desired thickness (we made big biscuits - 1" thick) and into a rectangle. This makes about 6 biscuits. If you want more, simply pat the dough thinner - 1/2-3/4" thickness and cut into more pieces.
  6. Cut the biscuits into squares (I don't have time for biscuit cutters and this way I don't have to re-roll dough, making it tough).
  7. Place about 1 1/2 inches apart on an ungreased baking sheet
  8. If you make the larger biscuits, they'll take longer to cook - 12-15 minutes. Smaller biscuits take 8-12. They're done when the tops are golden brown and the middle looks baked.
* This recipe includes sage, which gives it a lovely, warming flavor. If you don't have sage, other flavors that would be nice include savory, rosemary, thyme or maybe even oregano. You could also throw in 1/2 cup of dry cheese, like parmesan - into the dry ingredients - for a cheesy flavor that would work great with soup. 

December 1, 2010

The Toilet Head Dinner (no - wait, it wasn't actually from the toilet. ew. maybe i should rename this post...)

Lately, things have been a little busy at our house and I keep finding myself making quick one dish meals with whatever I can find in the fridge. Yet, they're still filled with healthy ingredients and I am even more happy to say they're delicious!

Check out this one. It took me about 1/2 hour. It was the end of the week and our fridge was nearly empty. So, it was completely experimental and not gourmet - but it's a good example of eating healthy with what you have in the fridge. Thankfully, it turned out to be pretty good. And believe me, my experiments don't always. Just ask my daughter about a recent experimental black bean & couscous soup. I know, what was I thinking? Even our dog refused to eat it!

Here's what I did...

Cut 2 organic chicken thighs I had in the fridge into small slivers and tossed them in a hot wok with a little olive oil and salt. (We buy chicken thighs sometimes because they're more reasonably priced than organic chicken breasts.) While thighs have a little more fat, we only add small pieces of meat to a dish of veggies so it's still a healthy choice.


While the chicken cooked, I cut fresh green beans, two sweet potatoes and zucchini into bite sized pieces, and chopped fresh garlic and shallots. Now, I never liked sweet potatoes as a kid because we always had them at Thanksgiving in one particular recipe, smothered in marshmallows. Sweet on sweet didn't do it for me. Love them prepared in a savory way.

After I cooked the chicken fairly thoroughly, (10 minutes or so - just till it's no longer pink and a little browned), I threw in the sweet potatoes, added a little salt and let the potatoes brown a little while I smashed the garlic and cut the shallots into slivers.

Green beans and zucchini went in next and I cooked those till the green beans were done - probably another ten minutes.


I did get a little distracted at this point because my baby (not yet two), who was using the "big toilet" in the bathroom a few steps and in line of sight from the kitchen, started shouting, "I stuck! I stuck!" As I turned to find out what in the world was going on, she wandered up to me with the Elmo potty seat stuck on her head. I burst out laughing (after I said, "EEWW! Let's not put that on your head, ok?!) and washed her hands and head. So...I think it was ten minutes.  Hahaha~!

Since I got a little distracted I didn't take a final pic of the dinner but it was actually delicious. I thought I'd miss having some kind of acidic element like tomatoes but the sweetness of the potatoes was just yummy against the green beans and savory chicken. I didn't put a lot of spices in this one - salt and pepper and the nice flavor of a little olive oil.

Just a little note on the value of sweet potatoes... they're a great source of Vit A, Vit C, Potassium, Magnesium, Phosphorus and folate. How's that for a fast, healthy dinner?

November 22, 2010

Whip it! Whip it Good! (or, How to Make Homemade Whipped Cream!)

So, if you are considering buying whipped cream in a can this week, I beg you to reconsider. Making it yourself tastes SO much better and your friends will all be impressed with your amazing culinary skills. Best of all, it only takes 5 minutes (so a little longer than I suggest in the video). Haha!

You can shorten the whipping time by using a stainless steel bowl - and do what I forgot to mention, chill the bowl with the cream in it for 15 minutes prior to whipping.

Enjoy!


November 5, 2010

Staying Healthy When Everyone Else is Dropping Like Flies Around You

We've reached the time of year when the darkness of night comes sooner and lasts longer. In it, I find the  reflective, quieter part of me beginning to surface. I find I'm ready for bed earlier and my body seems to want the rest. Listening to my body is a big part of my staying healthy - and keeping my kids that way. Since it's getting to be that time of year - when flu and cold season is beginning - I thought a little visit back to what I posted last year about building a healthy immune system might be in order.


How to stay healthy when everyone else is dropping like flies around you. Remember that rest, good nutrition and exercise are the best way to get started on a healthy immune system. As my mom used to say, "An ounce of prevention is worth a pound of cure."

Here's what I said last year about staying healthy and it still holds.

And, if you're already in the throes of the season's sickly woes, here's a good recipe for chicken noodle soup, click here.

Healthy Blessings.

OM

October 22, 2010

Oven Roasted Chicken in Ten Easy Steps

One of the reasons people don't like to cook whole chickens is the gross-out factor. The cold, clammy skin...pulling out the gizzards. It's not a romantic picture. However, the final result of a beautiful, golden roasted chicken IS a beautiful sight! So is the money you save by using an entire chicken and discovering how many meals you can get out of it. Not to mention the extra nutrients you get by using the bones to make your own homemade chicken stock.

Can you learn this? Of course you can. And with, I promise - minimal gagging. Let's begin. And, as usual- please read the WHOLE recipe before you start cooking.

A little reminder about cooking a chicken. While you're learning, start this a couple hours before you need to eat it or even the day before. It's not that difficult to slice off some chicken breast or pull off the drumsticks to warm up for dinner if you're done a little early. However, making small people sit around while the chicken finishes cooking is not fun for anyone (mostly you!). 


Organic Mama Café’s EASY Oven Roasted Chicken

Preheat oven to 450° F. Place oven rack in the middle.

Ingredients
½ onion
½ garlic bulb
½ lemon
½ c. olive oil or butter
2 T. Sea Salt
2 t. Pepper
1 1/2 T. dried Herbs of choice - rosemary, oregano, sage, thyme
1 whole organic chicken (defrosted - or it will definitely take longer to roast!)

Tools
2 small bowls 
1 roasting pan - One with a roasting rack is great but a pyrex oven proof glass baking dish or similar will work too
1 sandwich size plastic bag (we don't usually use plastic but this is a one time thing)
1 large plastic bag (for chicken bones)

Do all the "clean" stuff first
1.Cut all veggies and place extra in the fridge
2. Place 1/3 cup Olive oil or butter in a small bowl
3. Place salt and pepper & herbs of choice in a bowl

NOW - get your chicken out and place it right next to your roasting pan 

I pull the garbage straight over to where my pan is

4. Slide the chicken straight out of the package into the pan, minus the goupy juice. You still haven't touched the chicken at this point. Toss the bag right into that garbage can!

5. Open the small plastic bag - and keeping on hand clean, pull the innards out of the chicken (they're usually in a bag). Place them in the plastic bag and throw them in your freezer. We'll talk about how to use them next week.

6. With the same hand holding the chicken, add the ingredients in this order
olive oil or butter
salt and pepper & herbs (roll the bird around to coat the inside)
Shove the onions and garlic and lemon inside too
and toss the lemon inside too. 

7. At this point, some people truss (tie up) their chicken. I don't have time for this nonsense - but I do pop the wings behind the chicken so they don't burn. Here's what you do. Place the chicken breast up (This is controversial. Some folks swear birds should be cooked breast down but this has always worked for me). Then, grab one of the birds wings and slide your hand up to the joint that attaches it to the body of the bird. Break the joint so that you can slip the wing under the cavity of the bird. I also break the joint in the middle of the wing to make this easier. When you're done, both wings should be folded behind the bird's body. See the final pic for an example.

Now, you can wash your hands because you're done touching the bird.

8. If you like, you can brush some olive oil on the bird's breast and toss 2 t of sea salt on it

9. Pop the bird in the oven and after 10-15 minutes, turn oven down to 350 degrees.

10. Cook bird 20 minutes for each pound. If you're not using a roasting rack, it may take a little longer. Just check the temp!
Mmmmm...golden brown bird. Delicious!

The safest way to ensure a bird is done is to use a thermometer. According to www.allrecipes.com, the bird is done when " inner thigh (close to but not touching the thigh bone) reads at least 165 degrees F (74 degrees C)". If you don't have a meat thermometer, stick a knife into the thigh area. If you've cooked it for the full length of time and the juices comes out clear, it's usually done. "Done" meat should be tender and juicy and come apart easily.

Pull the bird out and let it rest for 10 minutes before you slice it - so the chicken will stay nice and juicy.

And there you have it. Easy chicken in 10 steps! When you've taken all the chicken off the bone (I usually do within two days of cooking it), throw the bones and reserve juice into the large plastic bag and freeze it. We'll use it to make chicken stock another time.

October 15, 2010

Homemade Almond Butter

I've had a lot of requests for the homemade almond butter recipe that I took to my visit to ABC15's Smart Families. It's so easy, it's almost not a recipe!

I make my own almond butter because I can monitor exactly what goes into it (oil, salt, sugar etc) and it's cheaper as well. If you didn't realize that almond/peanut butters often have unhealthy things in them, check the ingredient list on the one in your pantry. Surprise!

Here are a few of the ways I use almond butter - usually in place of peanut butter
Apples and almond butter
As protein in a fruit smoothie
Ants on a log (celery boats filled with almond butter and topped with organic raisins)
Almond butter and honey (or jam) sandwich
On toast for breakfast


Make Homemade Almond Butter

1. Place 3-6 cups of crispy nuts* in the food processor, depending on how big your food processor** is.  Don't fill it much more than half or the nuts won't pulverize properly.
2. Turn it on - high (see - not brain surgery!). 
3. Let the processor go - you might stop and pulse it for a while - until the nuts are pulverized. If they look like the pic below - keep going a few seconds longer. But, remember that almonds are going to be a little chunkier than peanuts.

4. Continue to process the nuts till they turn into almond butter. If you're impatient like me and you don't want to burn out your machine, add a little organic olive oil (1-3 T) until it's "buttery". As usual, just add a little at a time so you don't end up with almond soup. You can substitute unprocessed, organic virgin coconut oil for the olive oil - but the butter will become pretty hard in the fridge if you do.


5. Store in the refrigerator. I can't really say how long it will keep - because it never lasts long enough at our house to go bad.

*You can just use raw almonds out of a bag - but the crispy nut recipe gives the almonds a richer, toastier flavor

**You can also use a Vitamix to do this but not everyone has one of these incredible machines.


I said this in my post on homemade hummus - but I'll say it again. A food processor it truly an invaluable kitchen tool and it doesn't take up much space. If you don't have one - you can find some great prices on Amazon - here.


Just a note on almonds...
As of 2007, almonds sold by handlers (i.e. non-growers) in the United States are required by law to be "pasteurized". The intention of the pasteurization is to limit possible outbreaks of salmonella poisoning in the general public. Sadly, the method - super steaming the outside of the nut or gassing it - invalidates the "raw" categorization. These nuts go rancid a lot faster. Thankfully, the law does allow you to buy "real" raw nuts directly from growers.Here's a well written explanation of the process.

October 13, 2010

Homemade Hummus

And now, a quick break from my Finding Culture in Phoenix posts to finally offer up a recipe some of you have been waiting so patiently to see. I have had a few frustrating weeks of no camera and the pixels on my current cell are just too low to get a good blog pic. 


This is the of homemade hummus I took to my visit on ABC15's Smart Families, I got a lot of requests for the recipes for the hummus and the homemade almond butter. I'll do another post about the almond butter, another super easy recipe, by the end of the week.

Now, being a frugal and organic mama, I try to cook the beans I use for recipes like this from scratch. I do this for a few reasons, including....
1. It's cheaper. While I can buy a can of organic beans for about $1.09 (or less on sale), I can make about 5 times that amount of organic beans by buying them in bulk.
2. Avoiding canned food because of safety issues associated with BPA in can liners. A few companies are now using non-BPA liners and you can see a list here.
3. I can cook a lot at a time and freeze it for later use or just have an unending supply of hummus!

If you're thinking that making beans from scratch sounds like a lot of work, I can reassure you that it's not. It just takes a little planning. You can see how to make them right here.

Now, I do give an ingredients list but feel free to add a little more (or less) fresh garlic if you like and adjust the salt to your taste. It's always better to add a small amount of something so you don't have to go back and find more garbanzo beans to even out too much lemon or salt. 

Also, I use a food processor for this. A food processor is an invaluable tool for a cook who has a lot to do and doesn't want to mess around with a bunch of different tools. I can shred, chop and otherwise pulverize things that would take me forever to chop in this thing. If you don't have one, you can get a smaller one here or a larger one here

Hummus Recipe
Ingredients
2 1/2-3 cups garbanzo beans or one can organic beans, reserve the liquid
2 tablespoons Tahini (sesame seed butter)
4-6 peeled cloves of garlic
2 T lemon juice (more to taste)
2 tablespoons olive oil
1 teaspoon salt
black pepper to taste
*Optional - ingredients like red bell peppers, spinach, etc or add a little spice like red pepper flakes

Place all the ingredients, minus the bean liquid, into the food processor and blend till creamy. 
If it's too thick, add a little bean liquid - just a few tablespoons at a time - till it reaches the consistency you like.

If you like you can drizzle a little olive oil over the top before serving with your favorite chopped veggies. Ours are red, green, yellow and orange bell peppers, carrots, celery, jicama, cucumber, zucchini etc. Just take your pick. 

See - told you it was easy!!

Making Dried Beans

Seriously. So. Easy.

Ok, this post goes along with my fresh hummus recipe. I really don't buy canned beans anymore unless I've not planned well and need something in a hurry. It's just so much cheaper to make them from scratch and they taste amazing. I also use my crockpot for beans because I can leave it on, then go to bed or leave the house and I come home to food that's already cooked. Nice.

By the way, when I make garbanzo beans (or chickpeas) for hummus, I usually don't season them at all while they're cooking.

Here's how you make beans from scratch -


Beans from Scratch 
Ingredients
1.5 to 2 lbs of Beans - black beans, pinto beans, garbanzo beans (chickpeas), black eyed peas etc. 
1 T lemon juice
Seasonings - paprika, turmeric, bay etc. 
Salt (DON'T put this in till after the beans are cooked!)
1 inch piece of Seaweed - helps to break down bean sugar - (check your health food store)

1. Rinse beans thoroughly. Place in bowl with lemon and cover with several inches of water to soak overnight. This helps to break down those complex beany sugars that make you sing the tooty bean song after you've indulged in beans. 
OR
Place your beans in a large pan and cover with water. Bring water to a rolling boil and shut off the heat. These beans will only need to soak for 4 hours and this method is supposed to be even better at breaking down the complex sugar to reduce digestive issues.

2. After soaking, pour off the water and rinse beans again. Then, place in crockpot and cover with water. 

3. Add desired seasoning - minus salt. Adding salt before the beans are done will leave you with tough or undercooked beans. 

4. Cook beans on low for 6 hours OR on high for 4 or more - depending on the beans. Use common sense or check your crockpot book for wisdom. Big beans = more time, little beans = less. 

5. Once your beans are cooked, add salt to taste. 

If you don't have a crockpot, you can buy one here or just put your beans right back in the same large pot you soaked them in, cover with fresh water and cook them. Cooking time varies per bean but usually between 45 minutes and 1.5 hours. You usually want your bean to still have some shape when they're done so keep an eye on them. Same rules apply regarding seasoning and salt.

September 21, 2010

Crispy nuts


Crispy nuts (meaning almonds, walnuts, pecans etc) are a big hit at our house. I discovered them through a book about traditional food preparations, called Nourishing Traditions, and they have since become a staple in our diet. But what are "Crispy Nuts"? And why not just eat nuts? I'm glad you asked!

While nuts are very healthy for us and a great source of protein and good fat, as well as being in possession of cancer preventing, heart disease preventing and other amazing properties, they can be pretty hard to digest in their natural state. In fact, some of you may think that you can't eat nuts because they make your stomach hurt or your throat itch. But what you may be experiencing is a reaction to the enzyme inhibitors that exist in nuts. The best way to deactivate those enzyme inhibitors and make those nuts more digestible is to soak the nuts in some water and a little salt and then dehydrate them.

Though I first encountered this information in Nourishing Traditions and other food journals, I can actually vouch for the difference it makes in my own ability to enjoy eating raw nuts. Prior to learning this method, my throat would itch uncomfortably when I ate walnuts and I didn't really like the taste of raw almonds, though I figured they were probably better for me than roasted nuts because they didn't have a bunch of salt or artificial flavoring all over them.

After I tried soaking both almonds and walnuts, the itchy problem completely disappeared and I also discovered I loved the taste of the soaked almonds. And, my husband, who has always hated walnuts, thinks these ones taste amazing. They have a toasty, addictive flavor. Healthier than chips and a million times tastier!

Here's the recipe I use


Crispy Almonds
1 1/2 pounds of almonds a glass container
Filtered water to cover the nuts by a few inches
1 T. SEA salt NOT table salt

1. Leave the nuts in a warm place to soak overnight or for at least 7 hours. See the above pic.
2. After soaking, just pour the water off and dump the nuts on a big cookie sheet and place in the oven at 150 degrees F for 12-24 hours.

When they're done, the inside of the nuts should look kinda toasty and they'll have a roasty, crunchy taste and texture.

 
Nourishing Traditions suggests slightly less salt for walnuts and pecans but I confess that I rarely measure for this recipe. I just toss approximately a tablespoon for all three recipes and they always taste great. Also, NT recommends storing walnuts and pecans in the fridge, though ours rarely last long enough for this to be necessary.

Dehydrators work great for this process because the oven stays free for other uses. Unfortunately, my dehydrator isn't very big and I got tired of making these in batches so, I switched to my oven. It is important to note that according to raw food gurus, you need to keep the temp under 115 F in order to keep those digestive enzymes alive. But, if you don't have a dehydrator or if your oven doesn't go below 200, you'll still be getting a healthier product than what you'd be buying in the store.

I do want to mention that if you have an actual nut allergy - like something that causes anaphylaxis - I am NOT recommending this as a remedy. But, if you find that eating nuts just bothers your stomach a little or you just don't like the flavor, this is the recipe for you!

September 17, 2010

5 for Friday! Healthy Snacks for Busy Peeps

Here are the five snacks I took on my visit to Daphne Munroe's new show, Smart Families on ABC15. They are easy, inexpensive, healthy AND delicious!

As you might have guessed, the fruits and veggies in these snacks are organic though currently the nuts we buy are not. I'm looking for an affordable local provider for the nuts. And, cutting up your own fruits, veggies and cheese and making your own hummus or almond butter definitely saves money. It really doesn't take long and with the exception of "Ants on a log" - you can prep them the night before and they'll still be the right texture the next day. I save #4 and #5 for days I'm in a hurry. Of course, if you're really in a rush, fruit in its purest form - an uncut apple, orange, banana etc and a bag of nuts are always great!

1. Grapes, crispy walnuts and cheese sticks.

Let's talk about cheese for a minute. We don't buy much cheese and when we do, it's usually goat cheese from a local source. Because of that, we know it's fresh, preservative free and very digestible. But, if we do buy cow milk cheese, it's always organic and W-H-I-T-E. Yes, I'm a cheese snob. How many times have you seen bright orange milk? If you did see it, would you drink it? Exactly. That's what I thought. So, why are you eating that yellow stuff? It's not real cheese!!!

2. Veggies and hummus

This one is sooooo delicious and so easy to make. I just use whatever veggies I have on hand - like sweet red, yellow or green bell peppers, cucumbers, carrots, zucchini (though my daughters don't like this one raw!) etc and chop them up into kid sized sticks. Then, we usually make our own hummus because it's cheaper, tastier and definitely healthier than what you'll see in the store. But if you don't want to make it, read the ingredients to find one that only has the REAL ingredients - garbanzo beans, olive oil, garlic, salt & lemon juice.

3. Ants on a log.  Translated - celery with almond butter, topped with raisins. 'nuf said.

4. Apples and dipping almond butter. Here's my recipe for almond butter. SUPER easy!

5. "Nuts and Raisins". This is what we call this treat at our house. It's a favorite and actually comprised of a little dried fruit (whatever I have in the cupboard - apricots, raisins, cranberries or dates) and crispy almonds.

There you have it. A "five for Friday" - healthy easy homemade snacks. Enjoy!

September 15, 2010

Delicious Gluten-Free Apple Spice Muffins

This is a great gluten-free muffin recipe that I originally discovered on Kimi Harris’s blog, The Nourishing Gourmet after trying numerous recipes with these ingredients and failing miserably (like - 5 times!). I apologize in advance for not sharing a pic today but as soon as I finished the muffins, my test kitchen audience devoured them! I'll try to make another batch this weekend and post a pic. A note on the ingredients...
  • the recipe utilizes coconut flour - a gluten-free, fiber filled and low glycemic option to wheat flour. For the uninitiated, the glycemic index refers to how quickly a particular food triggers a rise in blood glucose levels. Increased fiber = slower release. 
  • coconut flour is a little pricey at 6.99/bag but the recipe only uses 1/2 cup for 9 muffins. And, if you’re missing baked goods while eating a gluten-free or low glycemic diet, the extra bucks may feel worth it.
  • This recipe is filled with GREAT Fat - coconut oil and good protein in the form of 3 eggs.
I made a few changes to Kimi's recipe, including adding vanilla, decreasing the cloves and apples and adding apple cider vinegar and zucchini.

Now, before we start baking, a quick tutorial about muffins.
1. A great secret to all good baking is to be sure your ingredients are all about the same temperature before you combine them. You don’t want hot honey and oil hitting cold eggs or you’re going to have a sugary omelet on your hands! ICK!
2. Kimi mentioned in her recipe not to exceed the recommended amount of fruit. Otherwise, these muffins will be wet. I can attest to this from personal experience.
3. Most of all - do not, I repeat, do NOT over-mix muffins. You simply want to combine the ingredients and make sure they don't have big clumps of dry flour. Be gentle.


Spiced Apple Muffins Makes 9 Muffins
Wet ingredients
1/3 cup of coconut oil
1/4 cup of honey
3 large eggs – break into a bowl right away so they’ll be close to room temp for mixing
1 t. apple cider vinegar
1 t. vanilla (optional)

Dry ingredients
1/2 cup of coconut flour
1 teaspoon baking soda
1/4 teaspoon fine sea salt
1 teaspoon ground cinnamon*
1/2 teaspoon ground nutmeg
a pinch of ground cloves (optional)
* if you don't have all the spices, sub 1 1/2 t. pumpkin pie spice

The good stuff!
1/2 c shredded apples
¼ c shredded zucchini
½ c. chopped walnuts or pecans for topping
1. Preheat the oven to 350 degrees
2. Prep the muffin tins with baking cups or by oiling and flouring the tins.
3. In a medium saucepan, melt, thoroughly whisk together & set aside to cool. It looks like gooey syrup.
  • Coconut oil
  • honey
4. Sift together the dry ingredients. Coconut flour can be a little lumpy so sifting will save you from over-mixing the muffins when combining the wet and dry ingredients. Measure your ingredients straight into the sifter.
  • coconut flour
  • baking soda
  • sea salt
  • cinnamon, nutmeg and cloves
5. In a separate bowl, gently whisk wet ingredients together till just mixed.
  •  Eggs 
  •  Honey and coconut oil 
  • Vinegar 

6. Add dry ingredients to wet and combine with a few swift strokes (12 maximum!)
7. Pour into muffin tins and sprinkle with some chopped nuts.
8. Bake for 20 minutes or until the tops are lightly browned and spring back to the touch.

September 14, 2010

Not Your Mother's Leftovers

We started Saturday a little slow since we stayed up late dining with friends and we never did get moving very quickly. We just hung out together, enjoying the laziness of the day. But several hours after our rather light breakfast, it became clear that little tummies were growling and in need of attention. Rather than starting a new meal, I began pulling out what was already in the fridge.

I sauteed a little fresh kale, thinly sliced, in a few tablespoons of very hot olive oil and tossed in some sea salt. 


Then, I added grilled corn from the last night and 3 roughly chopped garlic cloves. I always use fresh garlic for greens. There's no substitute for the flavor - plus it's great for your immune system!


Next some couscous and roasted red pepper (diced). It started to smell very good!


Finally, I found a a one dish meal my dear love made for us Thursday night. It had several varieties of squash and some red quinoa.

Here's what the final dish looked like. Pretty good for leftovers!

May 14, 2010

Whole Wheat Biscuit Recipe


Here's the recipe I promised. It's a delicious biscuit recipe made with 100% whole wheat pastry flour and yogurt. The biscuits are light and have a great flavor.

Wish I could tell you how long this takes - but I'm probably not a good measure. I dragged my youngest off the desk three times before finally resorting to having her "help" me by playing with flour at the counter. By the way, little people LOVE to "help" by measuring the flour or cutting the biscuits!

As my fourth grade teacher always said, READ all the instructions before following! :)
The instructions are detailed and a picture tutorial follows. Excuse the pic quality. I'm using my cell phone!

Whole Wheat Yogurt Biscuits 
Makes 14 - 2 1/2" biscuits

Dry ingredients
2 3/4 c. Whole wheat pastry flour
2 t. salt (I use sea salt - fine is best)
1 T + 1 t. baking powder
1 t. baking soda
2 t. sugar (optional - I use fine raw cane sugar)

Wet/fat ingredients
6-8 T. COLD butter (I do NOT use shortening...it's not food!)
1 1/2 c. yogurt

Tools needed
measuring spoons
measuring cups
glass measuring cup (for yogurt)
bowl
food processor (*optional but SO much faster)
Rubber or silicone spatula

*If you DON'T have a food processor, you can still make this recipe. You'll just measure your dry ingredients in a bowl and stir thoroughly. Then, cut butter in with a pastry cutter or two forks.

** An IMPORTANT NOTE ABOUT FLOUR! - Don't ever "scoop" your flour into the measuring cup. The measurement won't be accurate because the flour will pack into the scoop. Result: heavy biscuits. Instead, spoon the flour into the measuring cup. You could probably sift the flour for fluffier results but I haven't done it. Don't care that much. :)

1. Preheat oven to 450 F.
2. Combine 2 1/2 c. flour and other dry ingredients in a food processor & pulse till thoroughly blended.
3. Cut butter into little cubes (see pic).
4. Add butter cubes to dry ingredients and pulse until butter is in pieces that resemble coarse cornmeal or small peas. Don't overmix!
5. Dump dry ingredients into a bowl.
6. Add yogurt and only stir till ingredients are combined. RESIST the urge to beat it. Dough should look fluffy
7. Flour counter with remaining 1/4 cup flour and plop dough on it. It will seem damp.
8. Flour your hands and knead the dough about 6 times.
*Haven't kneaded before? Just stick the heel of your hand into the middle of it and squish - then turn the dough, fold it over and do it again! Easy!*
9. Gently pat the dough till it's about 1/2 inch thick.
10. Cut into biscuit shapes, whatever you like - as long as they're all the same size. Otherwise they won't bake evenly. Also, cut them as close together as possible so you don't have to re-shape the dough for another round. The less you handle the dough, the better!
11. Place on cookie sheet - close together for fluffy biscuits and spread out for crispier ones.
12. Bake 10-12 minutes, or until slightly golden brown. (Mine took exactly 12 minutes but they might take more or less depending your elevation.


They taste awesome hot but they aren't bad cold or reheated either.

 Good - Quality - Ingredients


 Cube your COLD butter


Crumbly flour and butter mixture


Fluffy yogurt dough

Time to cut the biscuits!


March 9, 2010

Not Your Mother's Hamburger Helper

Last night, after a late afternoon trip to the library, I made dinner for my family while my husband played with the kids. I was pretty excited I got to cook because my husband and I fight over dinner rights. We both find cooking so relaxing. There's something about planning and timing and chopping and touching all that beautiful fresh food that is immensely nourishing to the soul.

Of course, we try to pick food that is nourishing to the body as well. But lately, my challenge has been picking nourishing food my three and a half year old will actually eat. She's been on a yogurt, bananas and bread kick. Not bad choices but not very balanced. I usually have to say, "Sure, you can have that - AFTER you eat what I've made." Last night, my goal was to make something colorful and delicious that she'd at least be willing to try. It also needed to be quick because the girls were pretty tired.

After a quick inventory of the contents of the fridge, I found myself reaching for the basics. We had a small package of grass finished beef, carrots, fresh tomatoes, red and green peppers, onions, scallions (we're kind of onion fanatics), fresh garlic and some rice we'd cooked a few nights previously. As I listened to my daughters and husband chortling over whatever crazy game they had created, I reached back through my memory banks to figure out what my mom would have created with food like this. Here's what I did with it.

Not Your Mother's Hamburger Helper

Ingredients
1.5 lbs grass finished ground beef
2 large peeled carrots
2 tomatoes
1/2 green bell pepper
1/2 red bell pepper
1/2 onion
1 green scallion
3.5 cups of cooked rice (Mine was seasoned like Mexican rice courtesy of my husband)*
3 T. olive oil
1 t. paprika (more to taste if needed)
2 t. dried oregano (less if fresh)
1/2 cup chicken, beef or veggie stock

1. Brown the beef in a large saute pan or wok (I used a wok). Just add a few tablespoons of olive oil and cook till you can't see pink in the meat anymore.

2. While the meat is browning, mince the onion and throw it in with the meat.

3. Generously add salt and pepper to the meat - as well as the oregano and paprika.

4. Chop the carrots, peppers and scallion and garlic. I cut everything pretty small - almost minced - like confetti. I never liked big chunks of carrots in my food as a kid & neither do my girls.

5. Throw the carrots and peppers in as soon as you finish chopping them.

6. When the carrots and peppers are cooked, add the scallion, garlic and rice. I like to add garlic at the end to keep it as close to fresh as possible, retaining more of the nutritional properties.

7. Add a little chicken, beef or veggie stock if needed. Cooked rice can be a little dry after a few days.

8. Heat all the ingredients thoroughly.

9. Very important... TASTE the food!!  Add salt, pepper or spices if necessary.

10. MOST important step - always cook with love on your mind.

*Potatoes would be an appropriate substitute for the rice. While they don't need to be staples at every meal, they are very nutritious and a great source of potassium.

Dinner came together pretty quickly and we all sat down and gave thanks for the food in front of us. Then, my daughter took one look and grimaced. I smiled and told her she had to taste it. She took a tentative bite, her face lit up and she said, "Mom, this is really good. I love meat!"

Yay for small successes!!!
Related Posts Plugin for WordPress, Blogger...