As long as I can remember, I've loved to read. Well-written books have always had the power to transport me from wherever I am into the world of make-believe. As a young girl, I spent hours imagining myself the hero of my favorite stories - like Anne of Green Gables or Frodo in Tolkein's Lord of the Rings. In school, I was sent to the Principal's office more than once for reading in class instead of listening to my teacher. What can I say? The topics I chose were more interesting than hers!
It's just my luck that my girls love reading as much as I! We read at least a book or two every night and usually a bit before naps. It's a great "winding down" activity. We go to the library every two weeks or so and max out our checkout limit. We've found some great ones lately and I want to pass them on to those of you who love reading with your kids as much as we do!
Here are five for Friday. You'll notice I've listed the Illustrators along with the Authors. In children's books, the power pictures have to grab the attention of little people is just as important as the words until their vocabularies increase enough to realize the awesomeness of the stories themselves. So, I try to pick a variety of art styles when choosing books for my kids and the text has to be good enough to retain their attention. Also - regarding age level... My toddler is just as fascinated by the pics in these books as my four year old is with the words.
If you are interested in buying them, you can click the book titles to visit Amazon.com. I am an Amazon affiliate and buying through my link doesn't cost you any extra but helps to support my site. Amazon has great prices and used options so it's kinda like thrift store shopping (one of my favorite kinds of treasure hunts). Have fun!
Eleanor, Ellatony, Ellencake, and Me - Author C.M. Rubin, Illustrator Christopher Fowler
The story opens on darling little Eleanor, whose family's penchant for nicknaming gets so ridiculous they finally settle on calling her the letter "E". Part of the reason they can't decide what to call her is that they all have different ideas of who she should be someday. The rhyming language and funny, colorful illustrations bring Eleanor to life as she realizes if she ever wants to have a normal name, she needs to take matters into her own hands.
Just One More - Author Wendy Silvano, Illustrator Ricardo Gamboa
A funny little romp through the Andes Mountains in a bus driven by a driver who just can't say no! The bus is soon filled with all sorts of crazy characters and animals. Will they make it down the mountain? You'll have to read it to find out! Funny illustrations with a "rustic" feel.
Most Perfect Spot - Author & Illustrator Diane Goode
The little boy in this book wants to take his mother on a picnic and says he knows the "Perfect Spot". But as they get to the park they are met with all sorts of crazy scenarios that make a picnic seem impossible. Maybe the perfect Spot isn't really a picnic place - but something better!
In English, of Course - Author Josephine Nobisso, Illustrator Dasha Ziborova
Josephine Nobisso, the daughter of Italian immigrants who grew up in the Bronx, is very familiar with the reality of learning to tell a story in two languages. Her book highlights the experience of little Josephine, whose teacher helps her learn the vocabulary words she needs to tell her class a little about herself and a hilarious visit to a farm. Very cute book and not bad for helping native English speakers learn a few new words!
Willow - Author Denise Brennan Nelson and Rosemarie Brennan, Illustrator Cyd Moore
Willow is a lively, free spirited little girl who just doesn't fit the mold in her school's art class. Her teacher is forever annoyed with her for not drawing her pics the right way. While the other kids fear the teacher, Willow shows courage in making her art as she sees it in her heart. Most importantly, she treats her teacher with a kindness that transforms her teacher into a version of her best self. My kind of story. Cyd Moore's beautifully colored illustrations really capture the spirit of the characters and draw you into the story.
Do you read with your kids? What are some of your favorite books?
October 29, 2010
October 27, 2010
Organic Mama visits The Baker's Daughter (think CHOCOLATE!)
I've been wanting to do a vlog (video log for the uninitiated!) for a while and today I'm posting my first one. Yay!
Hope you enjoy. Please post your comments after the video! :)
The Grand Opening of The Baker's Daughter is Saturday, October 30, 2010 on the Southeast corner of 7th Avenue and Dunlap. If the lot is full, you should be able to park at the lot cat-corner - on the northwest corner.
See you there!!!
Hope you enjoy. Please post your comments after the video! :)
The Grand Opening of The Baker's Daughter is Saturday, October 30, 2010 on the Southeast corner of 7th Avenue and Dunlap. If the lot is full, you should be able to park at the lot cat-corner - on the northwest corner.
See you there!!!
October 26, 2010
Fall 2010 Garden #2
Summers in Arizona can be truly miserable. It's a scorching, painful but brief interval in a place where we enjoy gorgeous weather the rest of the year. But taking tiny people out in the middle of the town is probably ill advised if you want to avoid their getting heat exhaustion or a bad sunburn! On summer mornings, I get up as early as reasonably possible to go hiking or walking - usually around 5 - and spend only small amounts of time outdoors the rest of the day.
Consequently, when the weather begins to change during our version of "fall," I find myself loath to come inside at all. I wake up a little later, go on my walk or hike, come home to make the kids breakfast and then go back outside as soon as possible. My favorite thing to do is let the kids play outside while I stick my hands in the dirt and try to grow things.
Thus, I've been creating gardens wherever anyone will let me plant! The latest garden is at my sister-in-law's house. Here is what we're doing there...
Her back yard has an existing raised bed - part of which is part of the structural support for the tall wall behind her house. As you can see, her kiddos have been putting it to good use.

But, she wanted to plant something delicious there so we got to work. Because the dirt serves dual purposes of food growing and structural support, we decided to use the front half of the bed for gardening but leave the back undisturbed.
This existing flower bed was definitely more work - even with lasagna gardening because we didn't want it to be any taller than it already is - at 3.5 feet. So, rather than building up, we started digging. And - WOW - what hard work!! Unfortunately, this bed had not only been covered with "ornamental rock" - (GRRRR!! I hate that stuff!!!) - it was comprised of very hard clay soil filled with even more rocks.

Good thing I had my sifter with me. My father-in-law made this for me from some wire and wood. It does a great job of sifting out most big rocks so we can still use the native dirt (with amendment of course).

Even with the sifter, there were tiny rocks left. I'm not worried about them because we layered that garden with great stuff - just like my original garden. See the process here.

After about 6 hours of serious work (longer than it would have been if we hadn't been chasing two toddlers around the yard!), we finally finished the bed and planted seeds. And our lovely new gardener chose to plant lettuce, carrots, broccoli and spinach. We added some bachelor buttons for color and to attract good insects.

Now my sil just has to find time to water 5 minutes a day till the seeds come in and we'll install a drip system. Bet her boys will love eating carrots from their own garden!
October 22, 2010
Oven Roasted Chicken in Ten Easy Steps
One of the reasons people don't like to cook whole chickens is the gross-out factor. The cold, clammy skin...pulling out the gizzards. It's not a romantic picture. However, the final result of a beautiful, golden roasted chicken IS a beautiful sight! So is the money you save by using an entire chicken and discovering how many meals you can get out of it. Not to mention the extra nutrients you get by using the bones to make your own homemade chicken stock.
Can you learn this? Of course you can. And with, I promise - minimal gagging. Let's begin. And, as usual- please read the WHOLE recipe before you start cooking.
A little reminder about cooking a chicken. While you're learning, start this a couple hours before you need to eat it or even the day before. It's not that difficult to slice off some chicken breast or pull off the drumsticks to warm up for dinner if you're done a little early. However, making small people sit around while the chicken finishes cooking is not fun for anyone (mostly you!).
Organic Mama Café’s EASY Oven Roasted Chicken
Preheat oven to 450° F. Place oven rack in the middle.
Ingredients

½ onion
½ garlic bulb
½ lemon
½ c. olive oil or butter
2 T. Sea Salt
2 t. Pepper
1 1/2 T. dried Herbs of choice - rosemary, oregano, sage, thyme
1 whole organic chicken (defrosted - or it will definitely take longer to roast!)
Tools
2 small bowls
1 roasting pan - One with a roasting rack is great but a pyrex oven proof glass baking dish or similar will work too
1 sandwich size plastic bag (we don't usually use plastic but this is a one time thing)
1 large plastic bag (for chicken bones)
Do all the "clean" stuff first
1.Cut all veggies and place extra in the fridge
2. Place 1/3 cup Olive oil or butter in a small bowl
3. Place salt and pepper & herbs of choice in a bowl
NOW - get your chicken out and place it right next to your roasting pan
I pull the garbage straight over to where my pan is
4. Slide the chicken straight out of the package into the pan, minus the goupy juice. You still haven't touched the chicken at this point. Toss the bag right into that garbage can!
5. Open the small plastic bag - and keeping on hand clean, pull the innards out of the chicken (they're usually in a bag). Place them in the plastic bag and throw them in your freezer. We'll talk about how to use them next week.
6. With the same hand holding the chicken, add the ingredients in this order
olive oil or butter
salt and pepper & herbs (roll the bird around to coat the inside)
Shove the onions and garlic and lemon inside too
and toss the lemon inside too.
7. At this point, some people truss (tie up) their chicken. I don't have time for this nonsense - but I do pop the wings behind the chicken so they don't burn. Here's what you do. Place the chicken breast up (This is controversial. Some folks swear birds should be cooked breast down but this has always worked for me). Then, grab one of the birds wings and slide your hand up to the joint that attaches it to the body of the bird. Break the joint so that you can slip the wing under the cavity of the bird. I also break the joint in the middle of the wing to make this easier. When you're done, both wings should be folded behind the bird's body. See the final pic for an example.
Now, you can wash your hands because you're done touching the bird.
8. If you like, you can brush some olive oil on the bird's breast and toss 2 t of sea salt on it
9. Pop the bird in the oven and after 10-15 minutes, turn oven down to 350 degrees.
10. Cook bird 20 minutes for each pound. If you're not using a roasting rack, it may take a little longer. Just check the temp!

Mmmmm...golden brown bird. Delicious!
The safest way to ensure a bird is done is to use a thermometer. According to www.allrecipes.com, the bird is done when " inner thigh (close to but not touching the thigh bone) reads at least 165 degrees F (74 degrees C)". If you don't have a meat thermometer, stick a knife into the thigh area. If you've cooked it for the full length of time and the juices comes out clear, it's usually done. "Done" meat should be tender and juicy and come apart easily.
Pull the bird out and let it rest for 10 minutes before you slice it - so the chicken will stay nice and juicy.
And there you have it. Easy chicken in 10 steps! When you've taken all the chicken off the bone (I usually do within two days of cooking it), throw the bones and reserve juice into the large plastic bag and freeze it. We'll use it to make chicken stock another time.
October 21, 2010
my choice
Ah...How I enjoy this sweet little space where I get to chat with you - and hear back from you!! Mothering my little people has completely encompassed my time this past summer. My husband was out of town on several trips which took him away for weeks at a time and then he spent another week in the studio producing an album for a local artist. So, he was out of the loop for a while and I pulled double duty at home.
Consequently, the "take time for yourself" thing I always preach went out the window for a while. But, that's what partners do, isn't it? Support each other through the easy times and the more challenging ones. Thankfully, he's back full time and we're getting back into the crazy swing of the holiday season.
Last night, I spent a few hours in the kitchen. I wanted to cook something simple but nourishing, filling but easy on the stomach. I took the time to enjoy the perfect weight of a good knife in my hand while I sliced through lovely food that wanted to be eaten. I reveled in the fact that I have the ability, knowledge and desire to use beautiful fresh ingredients and make something that my family wants to eat. A lot of love and happy energy went into that meal. When I was finished, I sat and felt the delight of watching them appreciate the color and flavors in front of them.
Often, the day to day tasks involved in being a homemaker feel overwhelming. We do the same thing over and over - laundry, cleaning, cooking, dishes, negotiating conflicts, helping to pick up the perpetual mess on the floor and stressing about the grocery budget. Then, we wake up and start all over again.
This day to day sameness is the part of staying home with small ones that can really challenge a woman's confidence because it seems we never actually finish anything. I have to laugh at those who have made snide comments to me about how easy it is to just stay home all day. At least at work, I knew when I had done a good job or achieved success. There were letters of thanks from customers and monetary rewards.
At home, there are no "pat on the back" awards or financial bonuses for the endless hours of work. I have often felt the weight of this and frankly, felt discouraged by the "neverendingness" of it, despite my passionate love for my children and family. Since the time I chose to be home with my little people, phrases like, "A woman's work is never done" have really taken on new meaning for me. Now I know why my mom got up before 6 every day!
But part of that last paragraph is something I'm starting to cling to pretty tightly. I CHOSE (and choose!) to stay home. Sure, I could get a job that would contribute to our financial situation more significantly than vocal work, babysitting or storytelling. But, it would cut into something I consider far more important.
I stay home because I want to see all the "firsts" my girls experience. I want to laugh with them in the middle of the day and snuggle my baby to sleep for her nap. I want to be able to take the time to help each daughter figure out how to wisely navigate through her life choices, not rush her because I have to get to work. I want to be able to spend a few hours preparing a meal full of love and light - to nourish them and remind my whole family that life is supposed to taste good.
The truth is that - while there are no monetary rewards for this choice, the love and gratitude I see on the faces of my family reward me every day. My husband knows what I do, that this is a sacrifice of other parts of my life - and he loves me for it and encourages me to do the other things I love as well. The laughter of small people and the feel of their sweet arms around me lift my spirits when monotony of the everyday threatens to bury me.
Yes, I have made my choice and I am glad.
October 20, 2010
Our Fall 2010 Garden
Several years back, my mother-in-law (God bless her, sweet woman!) agreed to let me build a garden box in her back yard so we could do something fun together that we both enjoyed. We forged ahead, filled the boxes with compost and started planting. Our first gardening venture went great and we enjoyed a good harvest of plants and flowers.
Then...dum, dum, dum... I got pregnant. Everything I loved about gardening turned to dust...really...because I let most of it die. The smell of my favorite herbs - rosemary, basil, thyme etc. - made me want to turn and run the other way. Thankfully, the herbs grew - though unloved at the time. Though I've been gardening on a smaller scale since then, I was using most of my nurturing energy on babies.
Well, my break has lasted long enough. I'm ready to be back in the garden, breathing in the fresh clean air, feeling the dirt between my fingers and longing to eat something I've grown. Alas, our garden space looked a bit different...


In the past, we filled our gardens with compost - which can be expensive to buy and takes time to make yourself. This year, we decided to try "lasagna gardening" instead and it's proven to be so much easier.
Here's how it works. Instead of going through the process of buying or making compost, you just create layers of compost ingredients. These layers break down over time and create super rich garden soil. It's the perfect lazy gardener's garden! You don't have to wait for the layers to disintegrate - you can plant immediately. And - no digging required. (Um, unless you let your previous garden go to seed. Whoops!) Just lay down some paper and start this process anywhere in your yard.
This is what we did. After digging the giant weeds out of the garden, we put down a layer of cardboard and some layers of newspaper & hosed them till wet.


Finally - the fun part! We planted seeds - chard, broccoli, carrots, kale, radish, spinach, chamomile, catnip, bachelor buttons etc. - and a whole bed dedicated to onions and leeks. (Onions are an obsession of mine!!) We threw a thin layer of straw over the top of the beds to help the soil retain moisture (spongy). The seeds need to stay moist for the next few weeks till they all germinate.
We have already seen a few tiny little plants coming up but I'll post pics as they get bigger!
These are some other things you can use in a lasagna bed - pretty much anything you can compost goes in there.
Peat moss
Manure
Dried leaves
Fruit and veggie scraps (I like to chop these up or blend them so they break down faster)
Vegetation scraps from around the yard
Coffee grounds
Shredded newspaper
And - to answer the questions some of you are asking about what to plant...
These are the things that can be planted in Arizona right now.
Beets
Broccoli
Brussel sprouts
Cabbage
Cauliflower
Carrots
Chard
Collard greens
Lettuce
Leeks
Kale
Endive
Garlic
Onions (YES!)
Parsnips
Peas
Radishes
Spinach
Turnips
Beets
Here's a link to a great calendar by the U of A on gardening in the low desert.
Any of you planting a garden? What plants are you putting in? I love to get comments from you!
Then...dum, dum, dum... I got pregnant. Everything I loved about gardening turned to dust...really...because I let most of it die. The smell of my favorite herbs - rosemary, basil, thyme etc. - made me want to turn and run the other way. Thankfully, the herbs grew - though unloved at the time. Though I've been gardening on a smaller scale since then, I was using most of my nurturing energy on babies.
Well, my break has lasted long enough. I'm ready to be back in the garden, breathing in the fresh clean air, feeling the dirt between my fingers and longing to eat something I've grown. Alas, our garden space looked a bit different...

I have to give my mil credit for planting flowers
and tomatoes in it, especially when she was just as busy as me -
babysitting grandkids!
I needed help cleaning out those boxes - SOOO - when I saw this fellow hanging around, I roped him doing into some work!

In the past, we filled our gardens with compost - which can be expensive to buy and takes time to make yourself. This year, we decided to try "lasagna gardening" instead and it's proven to be so much easier.
Here's how it works. Instead of going through the process of buying or making compost, you just create layers of compost ingredients. These layers break down over time and create super rich garden soil. It's the perfect lazy gardener's garden! You don't have to wait for the layers to disintegrate - you can plant immediately. And - no digging required. (Um, unless you let your previous garden go to seed. Whoops!) Just lay down some paper and start this process anywhere in your yard.
This is what we did. After digging the giant weeds out of the garden, we put down a layer of cardboard and some layers of newspaper & hosed them till wet.

Then, We layered straw, compost (already in the raised beds), manure (from my friend who has goats), dried leaves and pine needles until the boxes were filled again.

Finally - the fun part! We planted seeds - chard, broccoli, carrots, kale, radish, spinach, chamomile, catnip, bachelor buttons etc. - and a whole bed dedicated to onions and leeks. (Onions are an obsession of mine!!) We threw a thin layer of straw over the top of the beds to help the soil retain moisture (spongy). The seeds need to stay moist for the next few weeks till they all germinate.
We have already seen a few tiny little plants coming up but I'll post pics as they get bigger!
These are some other things you can use in a lasagna bed - pretty much anything you can compost goes in there.
Peat moss
Manure
Dried leaves
Fruit and veggie scraps (I like to chop these up or blend them so they break down faster)
Vegetation scraps from around the yard
Coffee grounds
Shredded newspaper
And - to answer the questions some of you are asking about what to plant...
These are the things that can be planted in Arizona right now.
Beets
Broccoli
Brussel sprouts
Cabbage
Cauliflower
Carrots
Chard
Collard greens
Lettuce
Leeks
Kale
Endive
Garlic
Onions (YES!)
Parsnips
Peas
Radishes
Spinach
Turnips
Beets
Here's a link to a great calendar by the U of A on gardening in the low desert.
Any of you planting a garden? What plants are you putting in? I love to get comments from you!
October 18, 2010
My Summer Harvest
Some of you know I decided to grow a watermelon vine on my back patio this summer - right next to the mixed summer squash. Somehow I missed the memo that the vines would encompass my entire backyard (I have a townhouse!).
The summer squash vine grew over into our neighbor's yard - who is a really great sport. We kept finding these on our back wall.


I also grew chard all summer (so yummy!) and easy stuff like mint. It was just so hot this summer I couldn't bring myself to do much in the garden. Watermelon lessons: They need lots of room (either a 15'X15' patch or a fence where you can train them and remember to support the fruit) and good fertilizer (like fish emulsion) every few weeks. Ripeness: watch for the yellow patch on the bottom and don't wait for the little stem to turn brown (this advice was everywhere on the internet and in my books). This one never did - after months (!) - and it cracked in the last big storm, rendering it inedible. According to advice my farm girl mom gave me years ago, the huge yellow spot it had means it would have had great flavor and sugar content. Of course, I didn't see it because I was waiting for the stem to turn brown. Oh well.
Now the weather is great and I'm off to help put in a garden this morning. This week, I'll post pics of my large raised garden and the one I've been working on with my sister-in-law. Hopefully they'll inspire you to grow your own!
The summer squash vine grew over into our neighbor's yard - who is a really great sport. We kept finding these on our back wall.

They are some kind of summer squash and tasted kind of like spaghetti squash.
Here's the watermelon that survived (sort of).

This thing was SO heavy!! This heirloom variety, Moon & Stars,
will grow to between 25 and 40 lbs.
It is also beautiful with white and yellow "stars" on a field of green.
I also grew chard all summer (so yummy!) and easy stuff like mint. It was just so hot this summer I couldn't bring myself to do much in the garden. Watermelon lessons: They need lots of room (either a 15'X15' patch or a fence where you can train them and remember to support the fruit) and good fertilizer (like fish emulsion) every few weeks. Ripeness: watch for the yellow patch on the bottom and don't wait for the little stem to turn brown (this advice was everywhere on the internet and in my books). This one never did - after months (!) - and it cracked in the last big storm, rendering it inedible. According to advice my farm girl mom gave me years ago, the huge yellow spot it had means it would have had great flavor and sugar content. Of course, I didn't see it because I was waiting for the stem to turn brown. Oh well.
Now the weather is great and I'm off to help put in a garden this morning. This week, I'll post pics of my large raised garden and the one I've been working on with my sister-in-law. Hopefully they'll inspire you to grow your own!
October 15, 2010
Homemade Almond Butter
I've had a lot of requests for the homemade almond butter recipe that I took to my visit to ABC15's Smart Families. It's so easy, it's almost not a recipe!
I make my own almond butter because I can monitor exactly what goes into it (oil, salt, sugar etc) and it's cheaper as well. If you didn't realize that almond/peanut butters often have unhealthy things in them, check the ingredient list on the one in your pantry. Surprise!
Here are a few of the ways I use almond butter - usually in place of peanut butter
Apples and almond butter
As protein in a fruit smoothie
Ants on a log (celery boats filled with almond butter and topped with organic raisins)
Almond butter and honey (or jam) sandwich
On toast for breakfast
*You can just use raw almonds out of a bag - but the crispy nut recipe gives the almonds a richer, toastier flavor
**You can also use a Vitamix to do this but not everyone has one of these incredible machines.
I said this in my post on homemade hummus - but I'll say it again. A food processor it truly an invaluable kitchen tool and it doesn't take up much space. If you don't have one - you can find some great prices on Amazon - here.
Just a note on almonds...
As of 2007, almonds sold by handlers (i.e. non-growers) in the United States are required by law to be "pasteurized". The intention of the pasteurization is to limit possible outbreaks of salmonella poisoning in the general public. Sadly, the method - super steaming the outside of the nut or gassing it - invalidates the "raw" categorization. These nuts go rancid a lot faster. Thankfully, the law does allow you to buy "real" raw nuts directly from growers.Here's a well written explanation of the process.
I make my own almond butter because I can monitor exactly what goes into it (oil, salt, sugar etc) and it's cheaper as well. If you didn't realize that almond/peanut butters often have unhealthy things in them, check the ingredient list on the one in your pantry. Surprise!
Here are a few of the ways I use almond butter - usually in place of peanut butter
Apples and almond butter
As protein in a fruit smoothie
Ants on a log (celery boats filled with almond butter and topped with organic raisins)
Almond butter and honey (or jam) sandwich
On toast for breakfast
Make Homemade Almond Butter
1. Place 3-6 cups of crispy nuts* in the food processor, depending on how big your food processor** is. Don't fill it much more than half or the nuts won't pulverize properly.


2. Turn it on - high (see - not brain surgery!).
3. Let the processor go - you might stop and pulse it for a while - until the nuts are pulverized. If they look like the pic below - keep going a few seconds longer. But, remember that almonds are going to be a little chunkier than peanuts.


4. Continue to process the nuts till they turn into almond butter. If you're impatient like me and you don't want to burn out your machine, add a little organic olive oil (1-3 T) until it's "buttery". As usual, just add a little at a time so you don't end up with almond soup. You can substitute unprocessed, organic virgin coconut oil for the olive oil - but the butter will become pretty hard in the fridge if you do.


5. Store in the refrigerator. I can't really say how long it will keep - because it never lasts long enough at our house to go bad.
*You can just use raw almonds out of a bag - but the crispy nut recipe gives the almonds a richer, toastier flavor
**You can also use a Vitamix to do this but not everyone has one of these incredible machines.
I said this in my post on homemade hummus - but I'll say it again. A food processor it truly an invaluable kitchen tool and it doesn't take up much space. If you don't have one - you can find some great prices on Amazon - here.
Just a note on almonds...
As of 2007, almonds sold by handlers (i.e. non-growers) in the United States are required by law to be "pasteurized". The intention of the pasteurization is to limit possible outbreaks of salmonella poisoning in the general public. Sadly, the method - super steaming the outside of the nut or gassing it - invalidates the "raw" categorization. These nuts go rancid a lot faster. Thankfully, the law does allow you to buy "real" raw nuts directly from growers.Here's a well written explanation of the process.
October 14, 2010
Finding Culture in Phoenix, the Sunnyslope Art Walk, part 2
After a brief commercial interlude that included some bean cooking and hummus making, we are back to the remaining artists I met this weekend at the Sunnyslope Art Walk. If you missed part one - you can click here to read it.
Strangely enough, while both my husband and I are musicians, we didn't really get the 411 on all the bands that were playing there - mainly because they were playing (not talking). But there was a wide variety of music from artists like Full Moon Jazz, Desert Gumbo, The Beaded Lizards, T-Bone Daily and many more. Now back to THE LIST...
I must begin by apologizing to Madison Hallock because I promised to go in alphabetical order, thus proving my impartiality to the artists introduced. Alas, unbeknownst to me, my nearly-two year old rearranged my notes as I was distracted by my day job (mothering) and dear Madison moved to part two. Of course, now she's received even more blog space than she would have before, so it's better for her. Wait. Madison, did you bribe my daughter with yogurt balls or something?
As usual, I digress...
And now...Drumroll please!
Artist No. 5 - Madison Hallock of merMadison.


In the background, you can see there's a gourd decorated with intricate feather designs. It's amazing that anyone could draw something this detailed on paper, let alone convey their vision to a round object. Madison has a few more incredible looking creations like her apple and cameo gourds and the Koi designs. You can find them on Etsy or become a Facebook fan. There, Madison. Hope I made up for the alphabetical error.
And - on to -
Artist No. 6 - Cathy Manthey of Sophia Maria Designs
These little bits of fabric and color just filled the girlie side of me with joy. Yes. Apparently, I do have a girlie side hidden behind the hiking boots, books filled with big words and gardening gloves. This might explain my recent penchant for pink. Which is fully. Indulged. Here. Check out these DARLING designs.
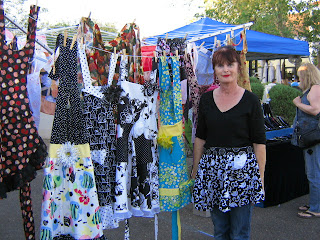
Regardless... Girls - you know how standing in the kitchen, cooking your life away can just be soooo exhausting, especially when you've been going all day and your feet feel like they simply won't hold you another minute? I'm totally convinced that wearing one of Cathy's aprons would immediately lighten the load.
Rob - are you listening? Honey?
And, that's not all. Sophia Marie Designs doesn't just do aprons, they have the most adorable little magnets you've ever seen - with a vintage look. Anyone need some FLAIR?


Strangely enough, while both my husband and I are musicians, we didn't really get the 411 on all the bands that were playing there - mainly because they were playing (not talking). But there was a wide variety of music from artists like Full Moon Jazz, Desert Gumbo, The Beaded Lizards, T-Bone Daily and many more. Now back to THE LIST...
I must begin by apologizing to Madison Hallock because I promised to go in alphabetical order, thus proving my impartiality to the artists introduced. Alas, unbeknownst to me, my nearly-two year old rearranged my notes as I was distracted by my day job (mothering) and dear Madison moved to part two. Of course, now she's received even more blog space than she would have before, so it's better for her. Wait. Madison, did you bribe my daughter with yogurt balls or something?
As usual, I digress...
And now...Drumroll please!
Artist No. 5 - Madison Hallock of merMadison.
This was the first thing that caught my eye when we reached the art walk because it's truly unusual.

a merMadison gourd
If you're thinking, "Hmmm, that kinda looks like a pumpkin." Well, you'd almost be right. It is a gourd, which is related to the pumpkin but has a lot harder shell. If you shake it, you'll actually hear seeds inside rattle. Madison dries the gourds, then carves and burns these intricate designs all over them. I was simply taken by their shape and beauty. Of course, at my house, they'd probably briefly become a musical instrument. Right before being smacked on the ground to remove the seeds. by crazy-little-people.Here's another pic of her work.

In the background, you can see there's a gourd decorated with intricate feather designs. It's amazing that anyone could draw something this detailed on paper, let alone convey their vision to a round object. Madison has a few more incredible looking creations like her apple and cameo gourds and the Koi designs. You can find them on Etsy or become a Facebook fan. There, Madison. Hope I made up for the alphabetical error.
And - on to -
Artist No. 6 - Cathy Manthey of Sophia Maria Designs
These little bits of fabric and color just filled the girlie side of me with joy. Yes. Apparently, I do have a girlie side hidden behind the hiking boots, books filled with big words and gardening gloves. This might explain my recent penchant for pink. Which is fully. Indulged. Here. Check out these DARLING designs.

Cathy Manthey with some of her Aprons
(Ok - I have to just insert here that I'm currently using a veeerrrryyyy old
*and crappy*
digital camera that just doesn't do justice to Cathy's lovely aprons. )
Rob - are you listening? Honey?
And, that's not all. Sophia Marie Designs doesn't just do aprons, they have the most adorable little magnets you've ever seen - with a vintage look. Anyone need some FLAIR?


Would these be perfect to attach the shopping list or the kid-created art to the fridge or what?!
So, get started on your Christmas shopping early (really, Robert...), and contact Cathy Manthy through her Facebook page or email her at smdesigns@cox.net
Moving on...
Artist No. 7 - Barbara Redmond, mixed media artist

Barbara Redmond
Some of you will remember from part one of this post, my venture into felt - AHEM - art. After viewing that exercise in futility, it will come as no surprise I hold Barbara's work rather in awe. My first glimpse into the world of felting came several years back while my college vocal ensemble was traveling through the British Isles and we ventured into a street market in Ireland, where vendors were selling gorgeous felted wool purses and scarves. I couldn't believe that wool could be so beautiful or so soft and when I saw they were priced at nearly 100 EUR, I knew I couldn't afford them either. Thankfully, while Barbara's scarves don't come close to the same cost as those of the Irish, they certainly are just as beautiful.
You may be wondering why in the world a girl in AZ would want a wool scarf. Well, these are not your grandmother's scarves. They are lightweight, delicate and filled with nuanced textures and colors. Perfect for a cool, Phoenix night out in "fall" - when you need a touch of color that won't roast you alive. These would be especially great for my vocalist friends who are always wrapping things around their necks - even in our mild winters. Here is a post from Barb's blog on how she makes her scarves. You can reach her there or through her Etsy page.
Artist No. 8 - Katie at Flights of Fancy
You can actually see the work of our next artist in Barbara's picture above - because they shared a booth. Katie is Barb's daughter and talent must run in the family. She's a bubbly lady with a great smile who clearly has her hands full.

Katie and her blue eyed boy
Yet, somehow she still finds time to create these incredible wind chimes out of items that most of us would consider junk. The way she combines the shapes and colors turns them into something beautiful. Here's a closer look.

Yes, people. That is an old metal pitcher.
I love this thing and it's now on my wish list. (Rob, are you writing this down?)
For your very own conversation piece created by Katie at Flights of Fancy, contact her at kt61180@yahoo.com
This concludes the list of artists I met at the Sunnyslope Art Walk - though there were many more worth mentioning. After all, people, we had our four and (nearly) two year-olds in tow. And even being the
über cultured girls they are, while chomping yummy Baker's Daughter chocolate and sitting in their comfy stroller - they were soon ready for new sights. So, feeling duly cosmopolitan-ized, we strode past the rest of the attractions and headed for home.
Did any of you go to the art walk? I love hearing from you! Leave me a comment. :)
October 13, 2010
Homemade Hummus
And now, a quick break from my Finding Culture in Phoenix posts to finally offer up a recipe some of you have been waiting so patiently to see. I have had a few frustrating weeks of no camera and the pixels on my current cell are just too low to get a good blog pic.

This is the of homemade hummus I took to my visit on ABC15's Smart Families, I got a lot of requests for the recipes for the hummus and the homemade almond butter. I'll do another post about the almond butter, another super easy recipe, by the end of the week.
Now, being a frugal and organic mama, I try to cook the beans I use for recipes like this from scratch. I do this for a few reasons, including....
1. It's cheaper. While I can buy a can of organic beans for about $1.09 (or less on sale), I can make about 5 times that amount of organic beans by buying them in bulk.
2. Avoiding canned food because of safety issues associated with BPA in can liners. A few companies are now using non-BPA liners and you can see a list here.
3. I can cook a lot at a time and freeze it for later use or just have an unending supply of hummus!
If you're thinking that making beans from scratch sounds like a lot of work, I can reassure you that it's not. It just takes a little planning. You can see how to make them right here.
Now, I do give an ingredients list but feel free to add a little more (or less) fresh garlic if you like and adjust the salt to your taste. It's always better to add a small amount of something so you don't have to go back and find more garbanzo beans to even out too much lemon or salt.
Also, I use a food processor for this. A food processor is an invaluable tool for a cook who has a lot to do and doesn't want to mess around with a bunch of different tools. I can shred, chop and otherwise pulverize things that would take me forever to chop in this thing. If you don't have one, you can get a smaller one here or a larger one here.
Hummus Recipe
Ingredients
2 1/2-3 cups garbanzo beans or one can organic beans, reserve the liquid
2 tablespoons Tahini (sesame seed butter)
4-6 peeled cloves of garlic
2 T lemon juice (more to taste)
2 tablespoons olive oil
1 teaspoon salt
black pepper to taste
*Optional - ingredients like red bell peppers, spinach, etc or add a little spice like red pepper flakes

Place all the ingredients, minus the bean liquid, into the food processor and blend till creamy.
If it's too thick, add a little bean liquid - just a few tablespoons at a time - till it reaches the consistency you like.

If you like you can drizzle a little olive oil over the top before serving with your favorite chopped veggies. Ours are red, green, yellow and orange bell peppers, carrots, celery, jicama, cucumber, zucchini etc. Just take your pick.
See - told you it was easy!!
Making Dried Beans
Seriously. So. Easy.
Ok, this post goes along with my fresh hummus recipe. I really don't buy canned beans anymore unless I've not planned well and need something in a hurry. It's just so much cheaper to make them from scratch and they taste amazing. I also use my crockpot for beans because I can leave it on, then go to bed or leave the house and I come home to food that's already cooked. Nice.
By the way, when I make garbanzo beans (or chickpeas) for hummus, I usually don't season them at all while they're cooking.
Here's how you make beans from scratch -
If you don't have a crockpot, you can buy one here or just put your beans right back in the same large pot you soaked them in, cover with fresh water and cook them. Cooking time varies per bean but usually between 45 minutes and 1.5 hours. You usually want your bean to still have some shape when they're done so keep an eye on them. Same rules apply regarding seasoning and salt.
Ok, this post goes along with my fresh hummus recipe. I really don't buy canned beans anymore unless I've not planned well and need something in a hurry. It's just so much cheaper to make them from scratch and they taste amazing. I also use my crockpot for beans because I can leave it on, then go to bed or leave the house and I come home to food that's already cooked. Nice.
By the way, when I make garbanzo beans (or chickpeas) for hummus, I usually don't season them at all while they're cooking.
Here's how you make beans from scratch -
Beans from Scratch
Ingredients
1.5 to 2 lbs of Beans - black beans, pinto beans, garbanzo beans (chickpeas), black eyed peas etc.
1 T lemon juice
Seasonings - paprika, turmeric, bay etc.
Salt (DON'T put this in till after the beans are cooked!)
1 inch piece of Seaweed - helps to break down bean sugar - (check your health food store)
1. Rinse beans thoroughly. Place in bowl with lemon and cover with several inches of water to soak overnight. This helps to break down those complex beany sugars that make you sing the tooty bean song after you've indulged in beans.
OR
Place your beans in a large pan and cover with water. Bring water to a rolling boil and shut off the heat. These beans will only need to soak for 4 hours and this method is supposed to be even better at breaking down the complex sugar to reduce digestive issues.
2. After soaking, pour off the water and rinse beans again. Then, place in crockpot and cover with water.
3. Add desired seasoning - minus salt. Adding salt before the beans are done will leave you with tough or undercooked beans.
4. Cook beans on low for 6 hours OR on high for 4 or more - depending on the beans. Use common sense or check your crockpot book for wisdom. Big beans = more time, little beans = less.
5. Once your beans are cooked, add salt to taste.
If you don't have a crockpot, you can buy one here or just put your beans right back in the same large pot you soaked them in, cover with fresh water and cook them. Cooking time varies per bean but usually between 45 minutes and 1.5 hours. You usually want your bean to still have some shape when they're done so keep an eye on them. Same rules apply regarding seasoning and salt.
October 12, 2010
Finding Culture in Phoenix, the Sunnyslope Art Walk, part 1
We all have been given gifts in life. I have been blessed with my share - for which I am truly grateful. But as those of you who know me would doubtless agree, none of those talents are in any way related to handmade art or even simple crafts. My mother was and my four sisters are, actually quite incredible in this area. Somehow, the art gene (non-singing one) skipped me. BooHoo. Here's the last attempt I made at doing something handmade with my 4 year old. According to the websites I visited, like this one, a very simple project (what-EVER Martha Stewart!). Here's how ours turned out...

Since I met too many to introduce in a day, this will be a "to be continued" post. I have no financial connection to these artists - they're just people whose stuff I enjoyed! ***Also, for those of you who are new to blogging and links, you can contact these artists by clicking the underlined titles of their businesses or the underlined items they create. Help contribute to the local economy and spend your money locally!***
So here, without further ado, is the art of some people who are incredibly gifted! Let me introduce - (alphabetically, no favoritism).
Artist No. 1 - Christine Boerner - Genius creator of Chocolate Art, A.K.A. The Baker's Daughter

Christine grew up under the tutelage of her parents, Karl and Stefanie Boerner, owners of Karl's bakery. Then she spent several years in Europe becoming a master of her craft. Chocolate lovers everywhere know that good chocolate is, in itself, a work of art. Not only is Christine's art edible, she uses only the finest quality ingredients to make it. For those of you who are not lovers of chocolate (read: CRAZY people), you can still see the beauty of her work below. She was also recently featured on Channel 10. Currently, you can find her chocolate at Karl's bakery on 7th Street and Dunlap and she'll be celebrating the opening of her own store - next door - on October 30.

Artist No. 2 -Kate Rowan Carey, owner of A Blissful Life. In her own words, "purveyor of lovely little treasures for your home and body". And her creations, which range from darling little cloth flower barrettes to trivets to (my favorite) cloth coffee cuffs, are perfect for adding a bright spot of color to your home. One of the best things about Kate's work is that it is sustainable in the sense that it is reusable. Having a party and need decoration? Check out one of her cloth banners. Does your daughter (granddaughter?) love playing princess? Do your part to save the planet and buy one of these little cloth crowns instead of the plastic ones.

Artist No. 3 - Purvi Desai, the beauty behind Zaaina Skincare, found at Central Slope, herbal infusions and reclaimed studio

Zaaina carries products for men, women and babies. You can visit them on their website www.zaaina.com or become a fan on their facebook page under Zaaina Skincare. You can also find out more about Central Slope at their website or by becoming a fan on their Facebook page.

Artist No. 4 - Robert Lievens of Fallen Wood Turnings
Mr. Lievens does exactly what his business name suggests - finds fallen wood and turns it into works of art. He's become so known for his work that people often bring wood to him from locales around the nation. We used to frequent the Downtown Phoenix Public Market instead of the Roadrunner Park Farmer's Market, and Robert would often be there. So fascinated was I by his knack for highlighting the most beautiful aspects of the wood he uses, I would stand and stare at the incredible things he'd crafted out of trees lost to our crazy Arizona storms.
When my younger sister bought her first house, I knew I wanted my gift to her to be something of beauty. I chose a sun catcher created from wood and pink agate from Robert's collection. He is also a knowledgeable and friendly person and spent some time showing me some of his photography (multi-talented guy!) on a camera he recommended to me. (As you can tell, I'm in the market for one!)


Stay tuned for more artists tomorrow!

It was supposed to be a beautiful little ball of felt. Ours looked like
animal intestines.
It should come as no surprise that I distinctly prefer enjoying the art of others, rather than slogging through a project whose result I'm bound to detest in the end anyway. This weekend, I did just that! My family and I got a little exercise and culture enjoying the Sunnyslope Art Walk and we had a wonderful time seeing the work of people who definitely have the art gene.
Since I met too many to introduce in a day, this will be a "to be continued" post. I have no financial connection to these artists - they're just people whose stuff I enjoyed! ***Also, for those of you who are new to blogging and links, you can contact these artists by clicking the underlined titles of their businesses or the underlined items they create. Help contribute to the local economy and spend your money locally!***
So here, without further ado, is the art of some people who are incredibly gifted! Let me introduce - (alphabetically, no favoritism).
Artist No. 1 - Christine Boerner - Genius creator of Chocolate Art, A.K.A. The Baker's Daughter

Christine Boerner, The Baker's Daughter
Christine grew up under the tutelage of her parents, Karl and Stefanie Boerner, owners of Karl's bakery. Then she spent several years in Europe becoming a master of her craft. Chocolate lovers everywhere know that good chocolate is, in itself, a work of art. Not only is Christine's art edible, she uses only the finest quality ingredients to make it. For those of you who are not lovers of chocolate (read: CRAZY people), you can still see the beauty of her work below. She was also recently featured on Channel 10. Currently, you can find her chocolate at Karl's bakery on 7th Street and Dunlap and she'll be celebrating the opening of her own store - next door - on October 30.

Ummmm... chocolate
Artist No. 2 -Kate Rowan Carey, owner of A Blissful Life. In her own words, "purveyor of lovely little treasures for your home and body". And her creations, which range from darling little cloth flower barrettes to trivets to (my favorite) cloth coffee cuffs, are perfect for adding a bright spot of color to your home. One of the best things about Kate's work is that it is sustainable in the sense that it is reusable. Having a party and need decoration? Check out one of her cloth banners. Does your daughter (granddaughter?) love playing princess? Do your part to save the planet and buy one of these little cloth crowns instead of the plastic ones.

Ms. Kate Rowan Carey, owner of A Blissful Life
Artist No. 3 - Purvi Desai, the beauty behind Zaaina Skincare, found at Central Slope, herbal infusions and reclaimed studio

Purvi Desai with her own line, Zaaina Skincare
Ms. Desai spent 10 years utilizing her finance degree by working for Fortune 500 companies before taking a decidedly different path. Zaaina Skincare makes products specifically balanced for different skin types, free of nasty stuff like parabens, artificial fragrances, dyes or chemical preservatives. In fact, Zaaina products are made from my favorite things - herbs. Purvi uses essential oils like tea tree and lavender to preserve the products safely and naturally. This also means they smell amazing. The product ingredients are available both on the packages and on the website and there's not a weird chemical among them. Check out the label on the skincare you're using and consider a switch to something natural (and locally made!).Zaaina carries products for men, women and babies. You can visit them on their website www.zaaina.com or become a fan on their facebook page under Zaaina Skincare. You can also find out more about Central Slope at their website or by becoming a fan on their Facebook page.

Central Slope, Herbal Infusions and Reclaimed Studio,
located south of Dunlap on Central Avenue
Artist No. 4 - Robert Lievens of Fallen Wood Turnings
Mr. Lievens does exactly what his business name suggests - finds fallen wood and turns it into works of art. He's become so known for his work that people often bring wood to him from locales around the nation. We used to frequent the Downtown Phoenix Public Market instead of the Roadrunner Park Farmer's Market, and Robert would often be there. So fascinated was I by his knack for highlighting the most beautiful aspects of the wood he uses, I would stand and stare at the incredible things he'd crafted out of trees lost to our crazy Arizona storms.
When my younger sister bought her first house, I knew I wanted my gift to her to be something of beauty. I chose a sun catcher created from wood and pink agate from Robert's collection. He is also a knowledgeable and friendly person and spent some time showing me some of his photography (multi-talented guy!) on a camera he recommended to me. (As you can tell, I'm in the market for one!)

Mr. Robert Lieven and one of his windchimes
Robert Lieven's work includes jewelry, bowls, ornaments, bells and windcatchers. If you are interested in adding a beautiful, touchable piece of art for your home or garden, this is the place to get it.
Stay tuned for more artists tomorrow!
October 8, 2010
Book Review: The Help, Kathryn Stockett
 I've spent the last week reading a book I borrowed from the friend of a friend. I became so engaged in the story that I thought of it every day until I could get back to it again. The book is called, The Help. Kathryn Stockett's book of historical fiction, set in Mississippi during the early days of the 1960's, doesn't focus much on the dangerous physical brutality of the Civil Rights movement. Instead, she sets out to tell the story of the tenuous relationships between the white women of Jackson, Mississippi and the black women who served them every day.
The Help gives us a glimpse into the lives of Southern women, black and white, who were raised to follow a certain set of unwritten social rules related to race. One of the main characters, Skeeter, has a burning desire to become a writer. Her first attempt is a secretly and anonymously written collection of stories by the black women of the town who serve the white women, many of whom are Skeeter's friends. As she gathers the stories, she soon learns that the connections between those serving and the served are not nearly as clear cut as she'd believed. Her own bonds with the white community begin to change as she finds the courage to follow her own convictions, buoyed by the strength of the women whose stories she's writing.
The book, published in 2009, received positive reviews like this one in The Washington Post and this one at The Huffington Post. However, other reviewers like this one in the California Literary Review and this blogging mom raise concerns about a white author telling this story, intimating that Stockett's characters rely too heavily on stereotypes. They draw comparisons between Stockett and Skeeter and their similar backgrounds and career choices and criticize Stockett's use of vernacular when writing the dialogue of the African American women.
While I understand those comments, I feel that Ms. Stockett has written a story worth reading. First, it does something that made me choose history as a major in college. It brings dates and events to life by telling the STORY of the kind of people who lived them. Not only did I feel a real connection to the women in those pages, I gained a deeper understanding of a social situation I'm not unfamiliar with since I live in Arizona, a border town hot with immigration issues.
Kathryn definitely knows how to write a story that touches the emotions. I laughed out loud more than once. I cried, I felt guilty. And, I alternately admired and feared for the courageous women who sought to tell their story. When I put the book down, I had that satisfying sensation I get after feeling my mind and heart have been stretched in a new way. Most importantly, Kathryn has written a good story. Unfairly "vernacular-ed"or not, it has the possibility to engage readers in a topic they might never have considered otherwise.
This review is a little late since the book came out last year but I was busy with a three month old at the time. I'm guessing some of you are as behind in your reading as I am! If you haven't already read it, take the time to check it out. Especially some of you dear friends whose eyes glaze over when I talk passionately about history. THIS is why. It's just someone's story - and it is as worthy of reading as yours is.
If you have a favorite book, add it to the comments list! I'm back on the reading wagon.
Subscribe to:
Posts (Atom)